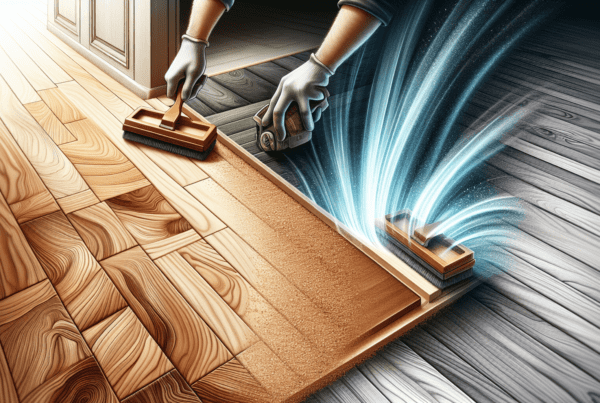
Nestled within this article, you’ll find a treasure trove of information dedicated to the art of Timber Floor Sanding and Finishing in Wellington. As homeowners who take pride in maintaining the aesthetic appeal and longevity of our living spaces, understanding the nuances of this craft is essential. From selecting the right materials to mastering the techniques that ensure a flawless finish, our guide aims to empower you with the knowledge needed to transform worn-out wooden floors into stunning masterpieces. Join us as we explore the best practices, insider tips, and local insights to help make your flooring project in Wellington a resounding success.
Understanding Timber Floor Sanding & Finishing
Definition and Significance
Timber floor sanding and finishing are essential aspects of maintaining and rejuvenating wooden floors. The process involves removing the top layers of a floor, using abrasive materials, to get rid of scratches, dents, and other imperfections. Finishing follows sanding; it involves applying a protective layer that enhances the floor’s appearance and durability. This process is significant because it not only restores the floor’s beauty but also extends its life, making our investment worthwhile.
Different Types of Timber Floors
In our homes, we may encounter various types of timber floors, including solid hardwood, engineered wood, parquetry, and bamboo. Each type has its unique characteristics and requires specific considerations during the sanding and finishing process. Knowing our floor type helps us choose the right approach to ensure we don’t damage it while aiming for the best results.
Benefits of Sanding and Finishing
Sanding and finishing our timber floors come with numerous benefits. Firstly, they enhance the aesthetic appeal of our home by bringing out the natural beauty of the wood. Secondly, they add a layer of protection against wear, tear, and spills, making the floor more durable. Lastly, a well-maintained floor increases the value of our property, which is beneficial if we ever decide to sell.
Preparation for Floor Sanding
Clearing the Area
Before we begin sanding, it’s crucial to clear the area completely. This means removing furniture, rugs, and any other items from the room. By doing this, we ensure a smooth, uninterrupted workflow and prevent any damage to our belongings.
Checking for Nails and Other Protrusions
Next, we must inspect the floor for nails, screws, or any other protrusions that could damage our sanding equipment. These should be either removed or hammered down below the surface level of the boards. This preparation step is essential for a smooth sanding process.
Filling in Gaps and Cracks
Over time, timber floors may develop gaps and cracks. Before sanding, we should fill these in with a suitable wood filler that matches the color of our floor. This not only improves the floor’s appearance but also prevents dust and debris from settling in these spaces during the sanding process.
Choosing the Right Sandpaper Grit
The choice of sandpaper grit is critical. We start with a coarser grit to remove the old finish and imperfections and gradually move to finer grits for a smooth surface. The exact grits to use will depend on the condition of our floor and the type of wood.
Tools and Materials Needed
List of Essential Tools for Sanding and Finishing
For sanding, we need a drum sander, edge sander, and a hand sander for hard-to-reach areas. Finishing requires brushes or rollers, and a vacuum cleaner is indispensable for cleanup. Keeping these tools at hand will streamline the process.
Safety Equipment
Personal protective equipment (PPE) is non-negotiable. This includes dust masks, safety goggles, and ear protection. These items protect us from wood dust, loud noises, and potential eye hazards.
Selecting the Best Type of Finish for Your Floor
The finish choice depends on our floor’s type and our lifestyle needs. Options include polyurethane, oil-based finishes, and water-based finishes. Each has its advantages and best use cases, from durability to ease of application and environmental impact.
The Process of Sanding
Starting with Coarse-Grit Sandpapers
We begin the sanding process with a coarse-grit sandpaper to efficiently remove old finishes and level the floor. This stage requires careful attention to avoid damaging the wood.
Progressing to Finer Grits
After the initial sanding, we switch to progressively finer grits. This step-by-step approach ensures a smoothly finished surface, ready for the final finishing touch.
Techniques for Effective Sanding
Effective sanding involves moving the sander in the direction of the wood grain and maintaining a steady pace to avoid uneven surfaces. Keeping the sander moving at all times prevents gouges in the floor.
Dealing with Edges and Corners
Edges and corners require special attention and a different approach. Using a hand sander or an edge sander helps us reach these areas and achieve a uniformly sanded floor.
Cleaning up After Sanding
Effective Vacuuming Techniques
Once sanding is complete, it’s crucial to vacuum the floor thoroughly. Using a brush attachment helps dislodge any residual dust from the floorboards, ensuring a clean surface for the finish.
Tackling Residual Dust
For any remaining dust, a tack cloth can be gently used to pick up fine particles. This step is essential for a flawless finish, as residual dust can affect the final appearance.
Preparing the Floor for Finishing
Before applying the finish, we ensure the floor is completely clean and free of dust. Sometimes, lightly dampening the floor can help raise the grain for a better finish adhesion.
Choosing the Right Finish
Types of Timber Floor Finishes Available in Wellington
Wellington offers a variety of timber floor finishes, including polyurethane (water-based and oil-based), hard wax oils, and natural oil finishes. Each has its specific benefits, from the durability of polyurethane to the natural appearance and environmental friendliness of oil finishes.
Pros and Cons of Each Type
Polyurethane finishes are highly durable but can be challenging to repair. Oil finishes offer easier repair options and a more natural look but may require more frequent maintenance. Understanding these trade-offs helps us make an informed choice.
How to Choose Based on Traffic and Usage
The choice of finish also depends on the floor’s expected traffic and usage. High-traffic areas benefit from a more durable finish like polyurethane, while bedrooms and less frequented areas might do well with the natural beauty and comfort of oil finishes.
Applying the Finish
Preparation of the Finish
Preparing the chosen finish according to the manufacturer’s instructions is crucial. This might involve mixing or stirring to ensure a consistent formula.
Application Techniques for a Smooth Finish
Applying the finish evenly with a brush or roller and following the wood grain ensures a smooth, streak-free surface. The edges are typically tackled first, followed by the larger floor areas.
Drying Times and Second Coat Application
Each type of finish has specific drying times that must be respected before applying a second coat or allowing foot traffic. Adhering to these times ensures the durability and appearance of our floor.
Curing and Aftercare
Curing Times for Different Finishes
Curing times vary widely among finishes, from 24 hours for some water-based polyurethanes to a few weeks for oil-based finishes. This period is crucial for achieving the full hardness and durability of the finish.
Tips to Protect Your Newly Finished Floor
During the curing period, we avoid placing rugs or furniture on the floor and keep foot traffic to a minimum. Following specific care instructions for our chosen finish will maintain its beauty for years.
Maintenance Routines for Longevity
Regular maintenance, including cleaning with appropriate products and promptly addressing spills, will extend our floor’s lifespan. Periodic reapplication of finish or maintenance coats can also rejuvenate the floor without full-scale sanding.
Troubleshooting Common Issues
Dealing with Bubbles and Streaks in the Finish
If bubbles or streaks appear, it’s often due to improper application techniques or environmental factors. Sanding the affected area lightly and reapplying the finish can resolve these issues.
Sanding Errors and How to Fix Them
Sanding errors, like uneven surfaces or gouges, require re-sanding the affected area with the correct grit sequence. This step ensures a smooth base before reapplying the finish.
Addressing Uneven Finishes
Uneven finishes can result from inconsistent sanding or application. Rectifying this involves a careful assessment of the problem area and targeted re-sanding and finishing.
Sustainability and Eco-Friendly Practices
Selecting Eco-Friendly Finishes
Choosing eco-friendly finishes, such as water-based polyurethanes and natural oils, reduces our environmental impact. These products often come with lower volatile organic compound (VOC) levels, making them safer for our homes and the planet.
Sustainable Timber Flooring Options
Opting for sustainably sourced or reclaimed timber flooring is another way to reduce our environmental footprint. Such choices support responsible forestry practices and reduce waste.
Minimizing Waste During the Sanding Process
Finally, adopting practices that minimize waste during the sanding and finishing process, like using efficiently designed sanders that collect dust, helps in maintaining cleaner air and reducing material waste.
By following this comprehensive guide to timber floor sanding and finishing in Wellington, we can ensure our floors are not only beautiful and durable but also sustainably maintained.


