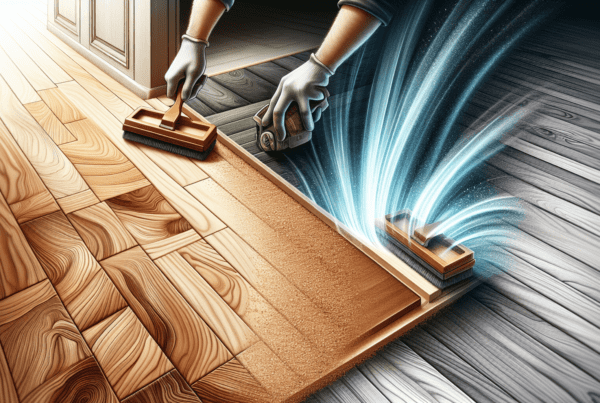
Embarking on a home transformation journey can often feel daunting, but it’s amazing how a simple change like floor staining can completely revitalize your living space. As trusted experts in Wellington floor sanding and Floor Staining, we’ve witnessed first-hand the astonishing impact that a carefully chosen stain can have on rooms of all sizes and styles. Whether you’re aiming for a chic, modern look or a cozy, traditional feel, the right stain can elevate your home’s aesthetic and create a warm and inviting atmosphere that you’ll fall in love with every time you step through the door. Join us as we explore the transformative power of floor staining and how it can breathe new life into your cherished space.
The Basics of Floor Staining
Understanding the Process
When we talk about floor staining, we’re talking about the practice of applying a specific type of color or finish to wooden floors to enhance their natural beauty and protect their surface. The process involves preparing the floor, choosing the right type of stain, and applying it carefully to ensure an even, lasting finish. We like to think of staining as not just a protective measure, but also an opportunity to express our style and creativity through our flooring choice.
Types of Stains
There are several types of stains we can choose from. Oil-based stains penetrate deeply, providing rich color and durability. Water-based stains are environmentally friendly and easy to clean up but may not last as long as their oil-based counterparts. Gel stains are a thicker consistency, making them perfect for vertical surfaces since they don’t drip. Lastly, there’s the lacquer stain, which dries quickly and is best suited for experienced hands due to its fast drying time and potent fumes.
Selecting the Right Stain for Your Flooring Material
It’s critical to select the right stain for our flooring material. Different woods accept stains differently, and not every stain is suitable for every type of wood. Hardwoods like oak and walnut take stain well and are quite forgiving, whereas softer woods like pine or birch can become blotchy without a pre-stain conditioner.
Advantages of Staining Over Other Floor Treatments
Staining has significant advantages over other floor treatments. It can enhance the grain and character of the wood, offers a wide range of colors and finishes, and can help to cover up imperfections. Perhaps most compelling is the way stain can completely transform a space without the need for a complete floor overhaul.
Preparation for Staining
Cleaning and Sanding Your Floors
Before we can begin staining, it is integral to properly clean and sand our floors. This ensures the stain absorbs evenly and adheres properly. We start by cleaning the floor of any dirt and debris and then proceed by sanding it down to smooth out imperfections and create a uniform surface.
Assessing Floor Condition
Assessing the condition of the floor is crucial. We need to look for any signs of damage, such as deep scratches, dents, or warped boards that might affect the end result of the staining process. Repairs or replacements may need to be made before we can proceed.
Materials and Tools Required
When staining our floors, we need several materials and tools: sandpaper, a sander, vacuum cleaner, tack cloth, brushes or rollers, gloves, and of course, the stain itself. Each plays an important role in achieving a flawless finish.
Safety Precautions During Preparation
Safety should always come first. This means wearing protective gear like masks and gloves to shield ourselves from the dust and fumes, ensuring the room is well-ventilated, and carefully following the stain manufacturer’s instructions.
Choosing the Right Stain Color
Coordinating with Interior Decor
The stain color we choose should complement our interior decor. We think about our furniture, wall colors, and the overall style we’re aiming for. A darker stain can lend a sense of richness and warmth, while a lighter stain might make our space feel more airy and open.
Testing Stains Before Application
A smart practice is to test stains before full application. We usually apply the stain to a small, inconspicuous area or a spare piece of the same wood to see how the color turns out. We take into account that the final color can be influenced by the wood’s inherent color and the stain’s opacity.
Understanding Color Psychology
We consider color psychology since colors evoke emotions. Darker stains might give a room a formal, luxurious feel, while lighter shades can create a relaxed atmosphere. The right shade can significantly affect our mood and the room’s ambiance.
Impact of Natural Light on Stain Appearance
Natural light affects the appearance of the stain throughout the day. We consider how much light the room gets and how it shifts with time when choosing our stain. A brightly lit room might wash out lighter stains or make darker stains appear even richer.
The Staining Process
Step-by-Step Guide to Applying Stain
Applying stain is a step-by-step process. We start by applying the stain with a brush or rag, working along the wood grain. We allow the stain to penetrate the wood and then wipe off the excess with a clean rag, again aligning with the grain.
Tips for Even Stain Application
For an even application, we work in manageable sections, blending into the wet edges to avoid lap marks. Keeping a wet edge and applying the stain consistently are key.
Dealing With Corners and Edges
Corners and edges can be tricky. We apply stain to these areas with smaller brushes to ensure full coverage and control.
Drying Times and Ventilation
After applying the stain, we allow for adequate drying time, which varies based on the stain type and environmental conditions. Maintaining good ventilation is crucial, not only for drying but also to keep us safe from potent fumes.
Post-Staining Treatments
Sealers and Finishes
Once our floors are stained and dry, we apply a sealer or finish to protect the stain and wood. This enhances the stain’s longevity and provides a barrier against wear and tear.
Waxing for Additional Shine
Some of us prefer to wax our stained floors for extra shine and protection. A high-quality floor wax can add depth to the stain and help shield against scratches and scuffs.
Maintaining Stained Floors
Maintenance is key to ensuring our stained floors stay beautiful. Regular cleaning with appropriate products and touch-ups for small imperfections help keep our floors looking their best.
Recommended Products for Post-Staining Care
We stick to recommended cleaning products that are specifically designed for stained wood floors. Gentle cleaners and microfiber mops help in maintaining the stain and finish.
DIY vs. Professional Floor Staining
Assessing the Complexity of Your Project
Before we dive into staining our floors, we assess the complexity of the project. DIY might be a good fit for small rooms or simple projects, but large areas or complex processes might call for professional help.
Cost-Benefit Analysis
We conduct a cost-benefit analysis. While hiring professionals can be costly upfront, it could save us from costly mistakes in the long run. Plus, they bring the expertise that ensures high-quality results.
Finding Reputable Professionals
Finding reputable professionals is key. We look for experienced craftsmen who are well-reviewed and come with strong recommendations, ensuring they’re a good fit for our specific needs.
Wellington Floor Staining Services
For those of us in Wellington in need of floor staining services, we search for local experts with a proven track record. By choosing the right professionals in Wellington, we can ensure our floor staining is done to perfection.
Troubleshooting Common Staining Issues
Blotchy and Uneven Finishes
Blotchy and uneven finishes are common staining issues. To avoid this, we ensure the floor is properly sanded and cleaned beforehand. Using a pre-stain conditioner on softer woods can help achieve a more uniform look.
Stain Repellent Areas
Sometimes we come across stain repellent areas. This occurs when remnants of old finishes or waxes are left on the floor. We make sure the floor is completely stripped and clean before applying the new stain.
Fade-Proofing Your Stained Floors
To fade-proof our floors, we use high-quality stains and finishes with UV protectants, and we try to protect our floors from prolonged sun exposure with curtains or blinds.
Repairing Stains After Damage
If our stain gets damaged, spot repairing is an option. We sand the damaged area, reapply the stain, and seal it. For major damage, it might be necessary to refinish the entire floor section.
Eco-Friendly Staining Options
Natural and Organic Stains
For us, going green with natural and organic stains is important. These stains are made with plant-based materials and are free from harsh chemicals, making them safer for our families and the environment.
Low-VOC and Water-Based Alternatives
Low-VOC and water-based stains are also available for a more eco-friendly option. These stains have reduced levels of volatile organic compounds, improving indoor air quality while still providing a durable finish.
Benefits for Your Health and the Environment
By choosing eco-friendly stains, we benefit our health and the environment. These stains often have less odor and toxicity, reducing our exposure to harmful substances.
How to Dispose of Stain Materials Responsibly
It’s important that we dispose of stain materials responsibly. We follow local waste management guidelines to ensure that leftover stains and solvents don’t harm the environment.
Advancing Your Living Space with Creative Staining Techniques
Innovative Staining Patterns
We can really personalize our spaces through innovative staining patterns. From checkerboards to borders, creative patterns can transform our floors into works of art.
Using Multiple Stain Colors
Using multiple stain colors can accentuate design features or define different areas in an open floor plan. This can add a unique touch of sophistication to our floors.
Creating Faux Finishes
Creating faux finishes, such as a marbled effect, can give our floor a luxurious appeal without the cost of the real material. It’s a creative way to up our design game.
Combining Stains with Other Flooring Trends
Our stained floors can surprisingly complement other flooring trends, like mixed-width planks or distressed wood. Stain can either tone down or highlight these trendy elements depending on the look we’re going for.
Latest Trends in Floor Staining
Color Trends and Innovations
We keep an eye on the latest color trends and innovations in floor staining. Rich, dark tones have been popular, but there’s also a shift toward natural finishes and gray undertones.
Emerging Techniques in the Industry
Emerging techniques, such as reactive staining, which interacts with the wood’s tannins to create unique colors, are rising in popularity. We are always on the lookout for new methods to try.
Staining in Modern vs. Traditional Homes
Staining works well in both modern and traditional homes. We carefully select colors and finishes that tie in with our home’s era and style, ensuring the stained floors enhance the overall aesthetic.
The Influence of Social Media on Floor Staining Designs
Social media is a significant influence on floor staining designs. Platforms like Instagram and Pinterest are great places to find inspiration and keep up with what’s trending in the world of floor staining. We allow ourselves to be inspired by the wealth of creativity out there – harnessing ideas and making them our own can result in truly stunning floors.


