If you’re looking to breathe new life into your tired, worn-out floors, then timber floor sanding is the way to go. At Four Star Flooring, we’re passionate about what we do and have decades of combined experience in the industry, making us experts in the field. With a full range of flooring services available, including sanding, polyurethane coatings, staining, and more, we can customize your timber floor to your exact preferences and bring out its natural beauty. Whether you prefer a sleek and modern finish or a unique and stunning whitewashed look, our team of specialists is here to revitalize your floors and create a space you’ll love. Have you ever looked at your tired, worn-out floors and wished there was a way to bring them back to life? Well, look no further than timber floor sanding. This process is a fantastic way to revitalize your floors and give them a whole new lease on life. Whether you have hardwood floors, parquet flooring, or any other type of timber flooring, sanding can deliver remarkable results. So, let’s dive into the world of timber floor sanding and explore the different aspects of this transformative process.
Sanding
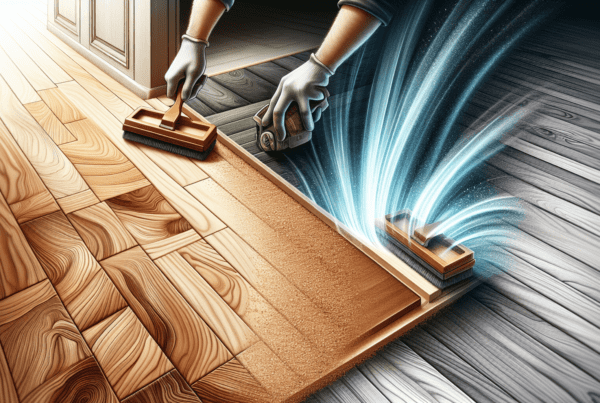
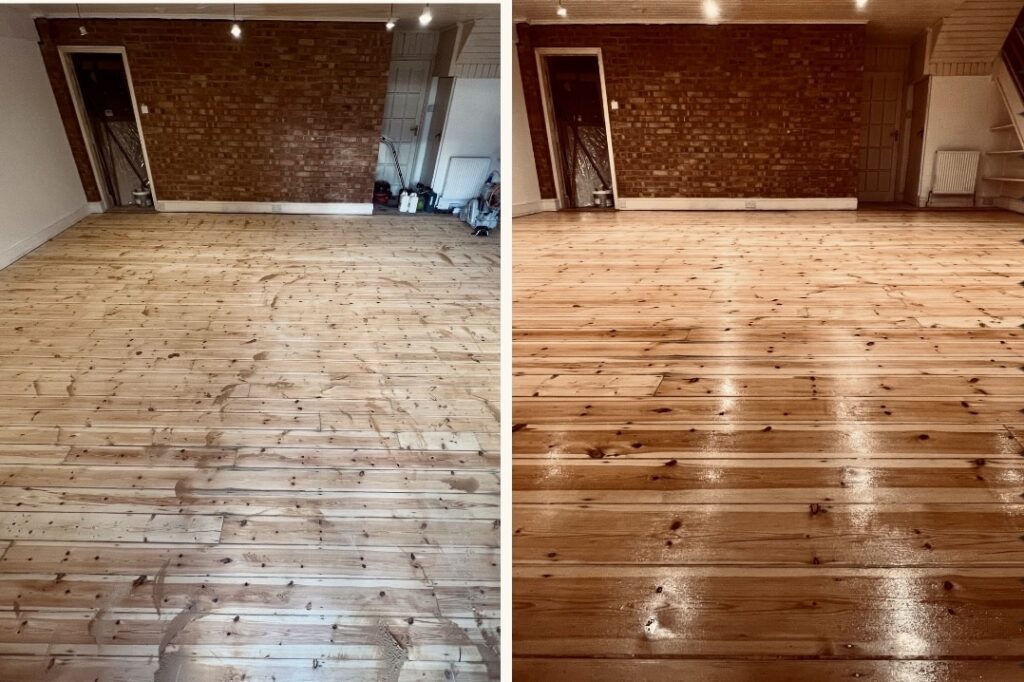
Sanding is the backbone of the timber floor revitalization process. It involves removing the top layer of your floor’s surface, which can be worn-out, scratched, or discolored, to reveal the fresh, untouched wood underneath. Sanding truly brings out the natural beauty of timber floors and provides a smooth canvas for the next steps in the revitalization process.
Types of Sanding Machines
There are several types of sanding machines available for timber floor sanding. The most common ones include orbital sanders, drum sanders, and edge sanders. Orbital sanders are great for finer sanding and finishing touches, while drum sanders are more powerful and ideal for initial sanding. Edge sanders, as the name suggests, are designed to tackle those hard-to-reach edges and corners. Choosing the right machine for your specific needs is crucial to achieving a professional and even finish.
Choosing the Right Sandpaper Grit
When it comes to sandpaper, there are various grit options available. Coarse grits, such as 24 or 36, are suitable for aggressive sanding and removing deep scratches or imperfections. Medium grits, like 60 or 80, are commonly used for general sanding and leveling surfaces. Fine grits, such as 120 or 150, come into play during the finishing stages, ensuring a smooth and polished look. Determining the right sandpaper grit for your floors depends on their condition and the desired end result.
Sanding Techniques
Sanding requires expertise and meticulous attention to detail. To achieve the best results, it’s essential to follow proper sanding techniques. Start by sanding in the direction of the wood grain, as sanding against it can cause damage. Gradually move from coarse to finer grit sandpaper, ensuring each pass overlaps the previous one for consistent results. Take your time and be mindful of any imperfections or unevenness that may require additional sanding. It’s always better to sand too little than to overdo it and risk damaging the wood.
Dealing with Imperfections
Imperfections like scratches, stains, or dents can be a common sight on timber floors, especially in high-traffic areas. Not to worry, though, as sanding can effectively address these issues. Deep scratches or stains can be sanded away by starting with a coarse grit sandpaper and gradually progressing to finer grits. Dents, on the other hand, may require additional methods, such as wetting the affected area and using steam to raise the wood fibers. By taking the time to deal with these imperfections during the sanding process, your floors will be left looking flawless.
Now that we’ve covered the fundamentals of sanding, let’s move on to the next step in the timber floor revitalization process: polyurethane.
Polyurethane
Polyurethane floor coatings are the go-to choice for homeowners looking to achieve a beautiful finish and long-lasting durability for their timber floors. Polyurethane coatings not only enhance the natural beauty of the wood but also provide a protective layer that guards against wear and tear.
Advantages of Polyurethane Floor Coatings
The advantages of polyurethane floor coatings are numerous. Firstly, they provide exceptional durability and resistance to scratching and staining, making your floors more resilient to daily wear and tear. Secondly, polyurethane coatings enhance the natural colors and grains of the timber, giving your floors a beautiful, rich appearance. Additionally, these coatings are available in different finishes, such as matte, satin, or gloss, allowing you to customize the look to your preference. Lastly, polyurethane coatings are relatively easy to maintain, requiring minimal effort to keep your floors looking their best.
Choosing the Right Polyurethane Finish
When it comes to polyurethane finishes, there are two main options to consider: oil-based and water-based. Both have their distinct characteristics and advantages, so it’s important to choose the right one for your needs.
Oil-based polyurethane finishes are known for their deep and rich color, providing a traditional and timeless look to your floors. They also tend to have a longer drying time, allowing for better self-leveling and reduced brush marks. However, they do come with a strong odor and longer curing times.
Water-based polyurethane finishes, on the other hand, offer a more contemporary and lighter appearance. They dry quickly and have a lower odor, making them more convenient for homeowners. While they may not provide the same depth of color as oil-based finishes, they are still a popular choice due to their ease of application and environmental friendliness.
Application Process
Applying polyurethane coatings requires precision and attention to detail. Before starting, ensure your floors are clean and free of any dust or debris. Begin by cutting in the edges using a brush, followed by rolling the main areas with a foam or synthetic applicator. Take care to apply thin, even coats to avoid streaks or bubbles. Allow each coat to dry thoroughly before applying the next one, and sand lightly between coats to ensure a smooth surface. By following these steps, you can achieve a flawless polyurethane finish on your timber floors.
Curing and Drying Times
Once the final coat of polyurethane is applied, it’s crucial to allow sufficient drying and curing time for the coating to fully set. Drying times can vary depending on factors such as humidity and temperature, so it’s best to refer to the manufacturer’s instructions for specific guidelines. Generally, water-based polyurethane finishes dry faster compared to their oil-based counterparts. Curing times, on the other hand, can range from a few days to a few weeks. During this period, it’s important to avoid heavy traffic or placing furniture on the floors to prevent any damage to the freshly applied coating.
With a beautifully sanded and polyurethane-coated floor, you might be considering adding some color to further customize and enhance the look of your timber flooring. That’s where staining comes into play.
Staining
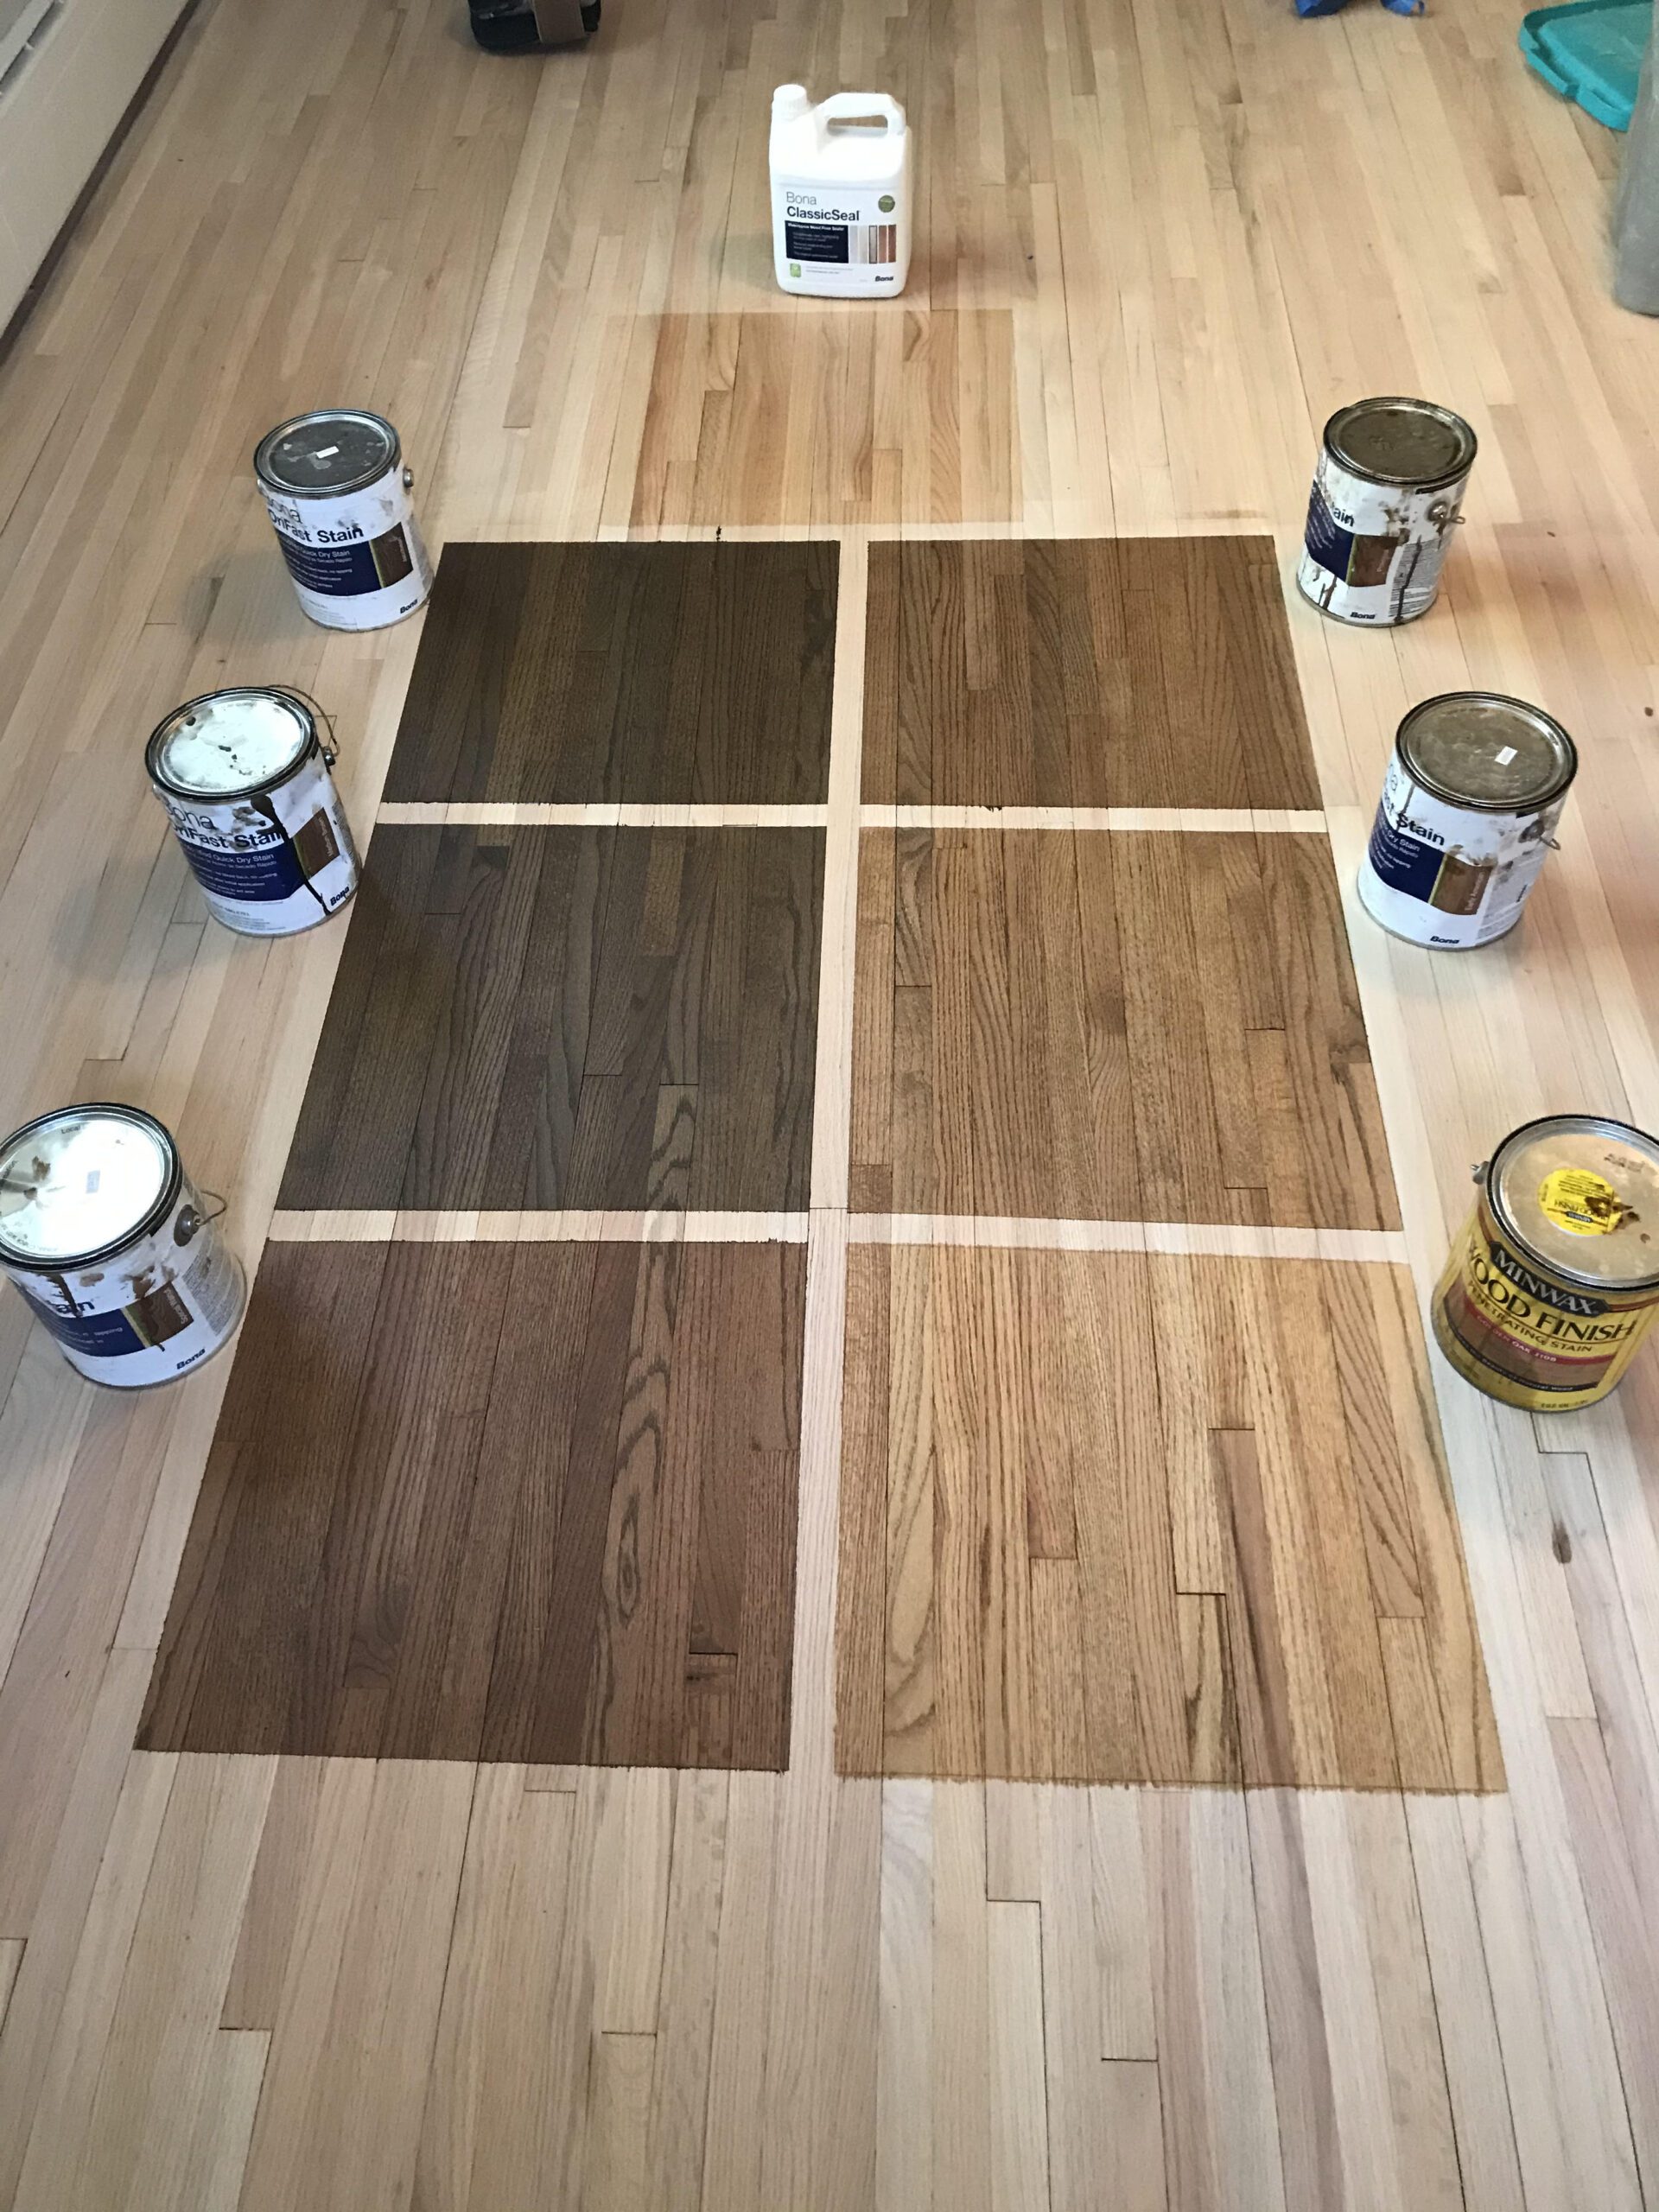
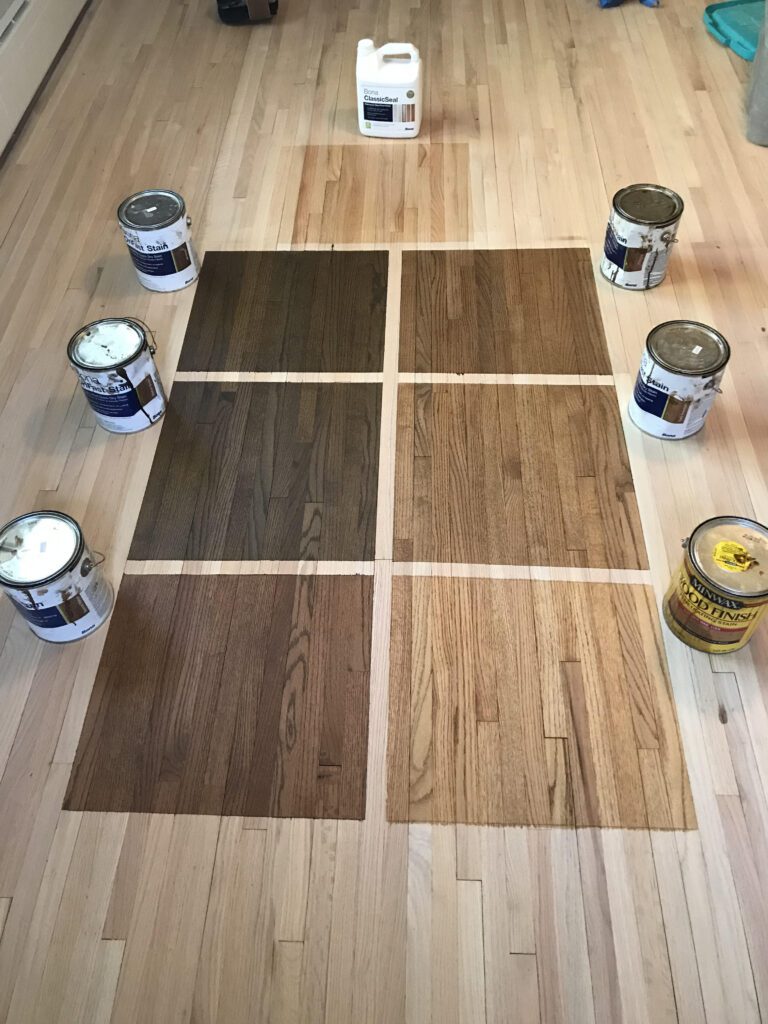
Floor staining offers a fantastic opportunity to add a personal touch to your timber floors by customizing their color and bringing out the unique grain patterns. Whether you prefer a warm and rich tone or a more contemporary and cool hue, staining allows you to achieve the exact look you desire.
Benefits of Floor Staining
There are several benefits to staining your timber floors. Firstly, staining can help to even out the color variations in the wood, giving it a more uniform and cohesive appearance. It also enhances the natural grain patterns, adding depth and character to your floors. Additionally, stains can provide a protective layer that helps guard against moisture and everyday wear and tear. By choosing the right stain and applying it correctly, you can transform your timber floors into true works of art.
Types of Floor Stains
When it comes to choosing a floor stain, you’ll find a wide range of options to suit your preferences. Some popular types of floor stains include oil-based stains, water-based stains, and gel stains. Oil-based stains offer deep, rich colors and are known for their durability. Water-based stains, on the other hand, offer a quicker drying time and a wider range of color options. Gel stains provide a thicker consistency, allowing for better control and coverage. Each type of stain has its unique properties, so it’s important to consider your desired outcome and consult with professionals to choose the best stain for your timber floors.
Proper Staining Techniques
To achieve the best results with floor staining, it’s important to follow proper techniques. Start by thoroughly cleaning and sanding your floors to ensure a smooth and even surface. Apply the stain evenly, working in small sections and following the wood grain. Take care not to leave any excess stain or overlapping marks, as this can result in an uneven finish. Allow the stain to dry completely before applying any protective coatings or finishes. By taking the time to properly stain your timber floors, you can create a stunning and unique look that reflects your personal style.
Maintaining Stained Floors
Once your timber floors are stained, it’s essential to maintain them properly to ensure their longevity and beauty. Avoid using harsh abrasives or cleaners that can damage the stain or the protective coatings. Regularly sweep or vacuum your floors to remove any dirt or debris that can cause scratches. Use a damp mop with a mild cleaning solution specifically formulated for stained timber floors. Additionally, consider placing rugs or mats in high-traffic areas to protect your floors from excess wear. By following these maintenance tips, your stained timber floors will continue to impress for years to come.
Now that we’ve explored the possibilities of staining, let’s dive into the world of oil-based and water-based polyurethane finishes and understand their differences.
Oil or Water-based Poly
When it comes to choosing the right polyurethane finish for your timber floors, the decision often comes down to whether you prefer an oil-based or water-based product. Both options have their advantages and considerations, so let’s take a closer look at each.
Comparison between Oil-based and Water-based Polyurethane Finishes
Oil-based polyurethane finishes have long been the traditional choice for timber floors. They offer a rich, warm color that enhances the natural beauty of the wood. Oil-based finishes also tend to be more durable and provide better resistance against scratches and stains. However, they come with a strong odor, longer drying and curing times, and higher VOC (Volatile Organic Compounds) content, which may not be suitable for those with sensitivities or environmental concerns.
Water-based polyurethane finishes, on the other hand, have gained popularity in recent years due to their faster drying times, lower odor, and environmental friendliness. These finishes provide a lighter and more contemporary appearance to timber floors. While they may not offer the same depth of color as oil-based finishes, they still provide excellent durability and protection against wear and tear. Water-based finishes also have lower VOC content, making them a safer choice for indoor air quality.
Pros and Cons of Oil-based Finishes
Oil-based finishes have several advantages. They offer a timeless and traditional look to your timber floors, enhancing their natural colors and grain patterns. Oil-based finishes are known for their durability and longevity, providing excellent resistance against scratches and stains. They also tend to have a longer drying time, allowing for self-leveling and reduced brush marks. However, they do come with a strong odor, longer curing times, and higher VOC content. If you can tolerate the smell and are willing to wait for the curing process, oil-based finishes can offer a classic and long-lasting solution for your timber floors.
Pros and Cons of Water-based Finishes
Water-based finishes offer a more modern and environmentally-friendly option for your timber floors. They dry quicker and have a lower odor compared to oil-based finishes, making them more convenient to apply. Water-based finishes still provide good durability and protection against daily wear and tear, although they may not offer the same depth of color as oil-based finishes. These finishes have lower VOC content, making them a safer and more eco-friendly choice for indoor air quality. If you value a fast-drying time, lower odor, and a contemporary appearance, water-based finishes are worth considering for your timber floors.
Application Tips
Applying both oil-based and water-based polyurethane finishes require attention to detail and proper techniques. Before applying any finish, make sure your floors are clean, dry, and free of any dust or debris. Stir the finish gently to avoid introducing air bubbles. Cut in the edges using a brush, and then roll the main areas using a foam or synthetic applicator. Apply thin, even coats, ensuring each coat overlaps the previous one to avoid streaks or bubbles. Allow each coat to dry thoroughly before applying the next one. When working with oil-based finishes, take extra caution due to their longer drying and curing times. By following these application tips, you can achieve a flawless finish on your timber floors, whether you opt for oil-based or water-based polyurethane.
Now that we’ve discussed the finishes, let’s explore the unique and stunning effects of whitewashing and blockout techniques on timber floors.

Whitewash & Blockout
If you’re looking for a truly unique and captivating look for your timber floors, consider the beauty of whitewash and blockout techniques. These methods can elevate the appearance of your floors, creating a distinctive and eye-catching focal point in any room.
Achieving a Whitewashed Look
Whitewashed floors offer an ethereal and light appearance that can brighten up any space. The technique involves applying a thin coat of whitewash or diluted paint to the timber surface, allowing the grain and natural colors to show through. Whitewashed floors are particularly popular in coastal or Scandinavian-inspired interior designs, creating a serene and beachy ambiance. The result is a stunning and elegant look that breathes new life into your timber floors.
Creating a Blockout Effect
Blockout floors, on the other hand, provide a dramatic and bold statement. This technique involves applying a dark-colored stain or paint to select areas of the floor while leaving other areas untouched. The contrasting colors create a visually striking geometric or patterned effect that adds depth and dimension to your floors. Blockout floors are often used as a focal point or to delineate specific areas within a room. With skillful execution, blockout floors can transform your timber flooring into a true work of art.
Maintenance and Care
Whitewashed and blockout floors require specific maintenance and care to preserve their unique beauty. For whitewashed floors, regular sweeping or vacuuming is essential to remove any dirt or debris that can accumulate and dull the finish. Avoid using harsh chemicals or abrasive cleaners that can damage or strip away the whitewash. Occasional light mopping with a damp, soft cloth is usually sufficient. For blockout floors, it’s crucial to be cautious when moving furniture or placing heavy items, as they can scrape or damage the painted or stained areas. Regularly inspect your floors for any signs of wear and consider applying a protective coat to ensure the longevity of the blockout effect. With proper care and maintenance, your whitewashed or blockout timber floors will continue to impress and captivate for years to come.
By now, you might be wondering what the benefits of timber floor sanding truly are. Let’s explore the numerous advantages of this revitalizing process.
Floor Sanding Benefits
Timber floor sanding offers a multitude of benefits that go beyond merely rejuvenating the appearance of your floors. Let’s dive into the advantages that make timber floor sanding a worthwhile investment for any homeowner.
Restoring the Natural Beauty of Timber Floors
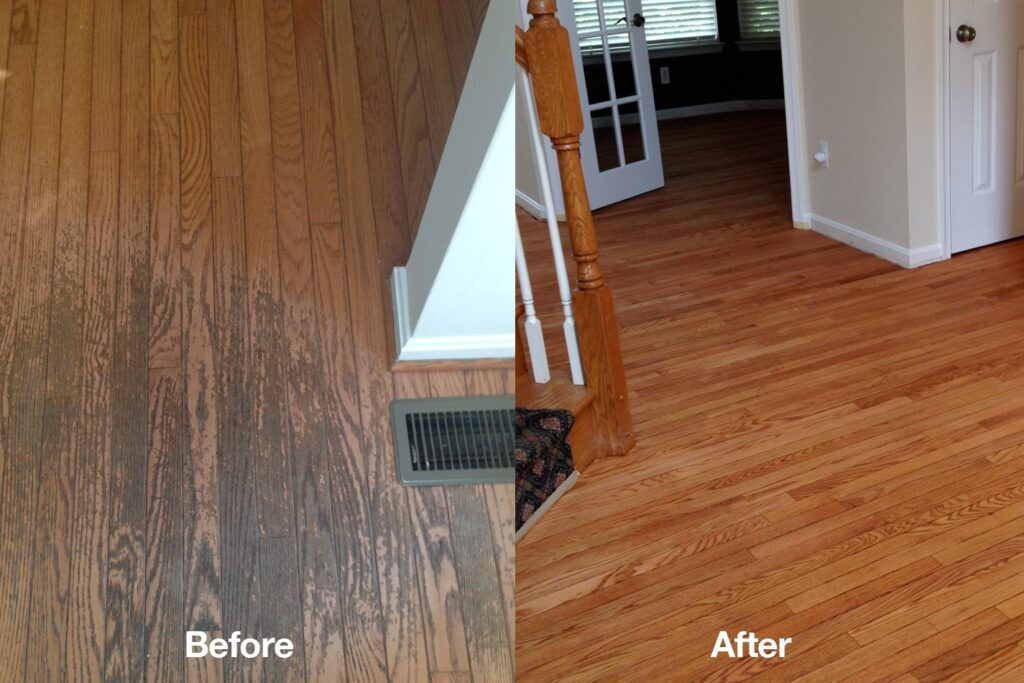
Over time, timber floors can begin to look dull, worn-out, or scratched. Timber floor sanding is a transformative process that breathes new life into your floors, restoring their natural beauty and luster. The sanding process removes the top layer of damage, revealing the fresh and untouched wood underneath. This revitalization can truly make your floors look as if they were installed yesterday, captivating anyone who walks into your home.
Removing Scratches, Stains, and Dents
Daily life can take a toll on your floors, leaving behind unsightly scratches, stains, or dents. Timber floor sanding provides a solution to these issues, allowing you to effectively remove or significantly reduce their appearance. Through careful sanding and refinishing, you can eliminate scratches, lift stains, and minimize the visibility of dents and imperfections. The result is a smooth and flawless floor that brings joy and pride to every homeowner.
Enhancing the Durability of Floors
Aside from the aesthetic benefits, timber floor sanding also enhances the durability and longevity of your floors. By removing the worn-out top layer, you eliminate any weak spots or damage that can compromise the structural integrity of the timber. The sanding process leaves behind a fresh and strong surface, ready to withstand the demands of daily use. Additionally, by applying a protective finish after sanding, you provide an additional layer of defense against future wear and tear, ensuring your floors remain resilient and beautiful for years to come.
Improving Indoor Air Quality
Timber floor sanding not only brings cosmetic improvements to your home but also contributes to better indoor air quality. Over time, dust, allergens, and other particles can accumulate within the cracks and crevices of your floors, impacting the air you breathe. Sanding removes this buildup, creating a healthier living environment for you and your loved ones. It’s important to note that during the sanding process, proper dust containment systems should be in place to minimize the spread of fine particles throughout your home.
With the numerous benefits that timber floor sanding offers, you might be wondering when it’s the right time to consider this revitalizing process. Let’s explore the signs that indicate your floors are ready for a sanding makeover.
When to Consider Timber Floor Sanding
While timber floor sanding is a transformative process, not every floor may require it. However, there are several signs that indicate it might be time to revitalize your timber floors with sanding. Let’s explore some of these indicators.
Worn or Dull Floors
If your floors appear worn, dull, or lackluster even after regular cleaning and maintenance, it might be a good time to consider sanding. Over time, foot traffic, furniture movement, and general wear and tear can take a toll on the appearance of your floors. Sanding can effectively remove the tired top layer, revealing the fresh and vibrant wood underneath, and breathe new life into your worn-out floors.
Deep Scratches or Stains
Deep scratches or stubborn stains can be a cause for concern, as they can impact the overall appearance of your floors and be difficult to hide. While minor scratches or stains can often be addressed with spot treatments or refinishing, more extensive damage may require sanding. By sanding your floors, you have the opportunity to eliminate or significantly reduce the visibility of these imperfections, restoring the beauty and integrity of your timber flooring.
Uneven or Wavy Floors
If your floors have become uneven or wavy over time, it can be both a visual and functional concern. Uneven floors can affect the stability of furniture, create tripping hazards, or simply appear unsightly. Sanding can help level out your floors, removing any high or low spots and creating a smooth and even surface. This not only improves the visual aesthetics but also makes your floors safer and more comfortable to walk on.
Now that you know when to consider timber floor sanding, the next step is to understand the equipment required to achieve professional results.
Choosing the Right Sanding Equipment
Choosing the right sanding equipment is crucial to achieving a professional and flawless finish. The type of machine and sandpaper grit you choose will depend on the condition of your floors and the desired end result. Let’s explore some of the sanding equipment commonly used in timber floor sanding.
Orbital Sanders
Orbital sanders, also known as random orbital sanders, are versatile machines suitable for both DIY enthusiasts and professionals. These sanders feature a round sanding pad that moves in both a circular and random orbital motion, ensuring a smooth and even sanding result. Orbital sanders are great for finer sanding and finishing touches, as they minimize swirl marks and reduce the risk of over-sanding in one spot.
Drum Sanders
Drum sanders are more powerful machines designed for initial sanding and leveling of timber floors. These sanders feature a rotating drum covered in sandpaper, allowing for efficient and aggressive sanding. Drum sanders are typically used for removing the top layer of finish or damaged wood, preparing the surface for finer sanding. Due to their power, it’s essential to handle drum sanders with care and follow proper sanding techniques to avoid over-sanding and damaging the wood.
Edge Sanders
Edge sanders, as the name suggests, are specifically designed for sanding the edges and corners of timber floors that are hard to reach with larger sanders. These sanders feature a narrow sanding belt or disc, allowing for precise sanding in tight areas. Edge sanders are invaluable when it comes to achieving a consistent and professional finish throughout your floors, ensuring no spot is left untouched.
Vacuum Systems
When sanding, the fine dust particles produced can quickly accumulate and create a mess. A vacuum system is an essential component of the sanding process, as it helps to contain and remove the dust. Sanding machines equipped with integrated vacuum systems are highly recommended, as they minimize airborne dust, improve safety, and make the cleanup process much easier. Ensure your sanding equipment is compatible with vacuum systems or consider using a separate industrial-grade vacuum for maximum dust control.
Choosing the right sanding equipment is critical in achieving optimal results. If you’re unsure or not confident in using these machines yourself, it’s best to consult with professionals who have the expertise and experience to handle the sanding process effectively.
Now that you’re familiar with the sanding equipment, let’s explore how to prepare your floors before sanding.

Preparing Your Floors for Sanding
Properly preparing your floors before sanding ensures the best possible results and helps protect your furnishings and surfaces from any potential damage. Let’s go through the steps to prepare your floors for sanding.
Clear the Area
Before starting the sanding process, remove all furniture, rugs, and any other items from the room. This will give you ample space to work and prevent any potential damage or hindrances. If you can’t remove certain heavy furniture pieces, consider covering them with plastic or drop cloths to minimize the risk of dust or sanding debris settling on them.
Inspect and Repair
Thoroughly inspect your floors for any loose or damaged boards. Secure any loose boards with nails or screws, ensuring a stable and even surface for sanding. Fill in any larger gaps or cracks between boards with wood filler or putty, and allow them to fully dry before proceeding with sanding. By addressing these issues prior to sanding, you can ensure a smooth and uniform surface.
Remove Existing Coatings
If your floors have existing coatings, such as wax, varnish, or polyurethane, you’ll need to remove them before sanding. This can be done using a chemical stripper or a floor sanding machine with a coarse grit sandpaper. Follow the manufacturer’s instructions for the chemical stripper and ensure proper ventilation during the process. If using a sanding machine, take extra care to avoid over-sanding or damaging the wood.
Clean and Dust
Once any existing coatings are removed, thoroughly clean your floors to remove any dust, debris, or residue. Sweep or vacuum the entire area to ensure a clean surface for sanding. Additionally, use a damp cloth to wipe down the floors, removing any remaining dust or particles that may have settled. This step is crucial to ensure a smooth and even sanding process.
Now that your floors are prepared and ready for sanding, let’s delve into the timber floor sanding process itself.
Timber Floor Sanding Process
The timber floor sanding process involves a series of steps that transform your tired and worn-out floors into stunning and vibrant masterpieces. Let’s explore each stage of this process to understand what it entails.
-
Initial Sanding: Start with a coarse grit sandpaper on a drum sander to remove the top layer of the floor. Begin from one corner of the room and move methodically, going with the wood grain. Take care not to push the sander too hard, as it can cause uneven sanding or gouging of the wood.
-
Edge Sanding: Use an edge sander to tackle the corners and hard-to-reach areas that the drum sander couldn’t reach. Again, work along the direction of the wood grain, being mindful not to linger in one spot for too long.
-
Intermediate Sanding: Switch to a finer grit sandpaper and repeat the sanding process with both the drum sander and edge sander. This step helps to further reduce imperfections and level out the surface.
-
Finish Sanding: Use an orbital sander equipped with a fine grit sandpaper to achieve a smooth and polished surface. This step removes any remaining scratches or marks left from the previous sanding.
-
Edging and Detailing: With the edge sander, carefully sand the edges and corners to achieve a consistent finish throughout the room. Pay close attention to detail, ensuring all areas are evenly sanded.
-
Filler or Putty: If your floors have any small gaps or holes, apply a suitable filler or putty to ensure a smooth and even surface. Allow the filler to dry completely before proceeding to the next step.
-
Final Sanding: Use a finer grit sandpaper on the orbital sander for a final sanding pass. This step creates a flawless finish and prepares the surface for the application of coatings or finishes.
Once the sanding process is complete, your floors are now ready for the finishing touches that will truly bring out their beauty.
Finishing Touches
The finishing touches are the final steps that complete the transformation of your timber floors. They enhance the appearance, durability, and overall aesthetic of your newly sanded floors. Let’s explore these essential steps.
Applying a Final Coat of Finish
After sanding, it’s time to apply the final coat of finish to your timber floors. Whether you choose polyurethane, oil-based, or water-based finishes, follow the manufacturer’s instructions for proper application. Ensure the floors are clean and dust-free before beginning. Use a brush or applicator to cut in the edges and corners, and then roll the main areas with a foam or synthetic applicator. Apply thin, even coats, allowing sufficient drying time between each. By applying a final coat of finish, you provide an added layer of protection and luster to your floors, sealing in the beauty and ensuring their longevity.
Polishing for a Smooth and Glossy Look
If you desire a smooth, glossy, or high-shine look for your timber floors, polishing is the final step to achieve that coveted finish. Use a floor polisher equipped with a polishing pad or attachment to gently buff the surface of your floors. This process brings out the natural luster of the wood and creates a stunning visual impact. Take care not to apply excessive pressure or leave the polisher in one spot for too long, as it can result in an uneven finish. By polishing your floors, you elevate their appearance and add an extra layer of sophistication to your space.
Caring for Your Newly Sanded Floors
Congratulations, you’ve successfully revitalized your timber floors through sanding! Now, it’s important to care for them properly to showcase their beauty for years to come. Here are some essential care tips to maintain your newly sanded floors:
- Regularly sweep or vacuum your floors to remove any dust or debris that can cause scratches.
- Use a damp mop with a mild cleaning solution specifically formulated for timber floors to clean any spills or stains.
- Avoid using harsh chemicals, abrasive cleaners, or steam mops, as they can damage or strip away the finish.
- Place rugs or mats in high-traffic areas or near entryways to prevent excess wear on your floors.
- Use furniture pads or felt protectors under the legs of your furniture to avoid scratches or indentations.
- Avoid exposing your floors to excessive sunlight, as it can cause fading or discoloration.
By following these care tips, you can enjoy the beauty and durability of your newly sanded timber floors for many years.
In conclusion, timber floor sanding is a fantastic way to revitalize your floors and bring them back to life. From the sanding process to choosing the right finishes, there are numerous aspects to consider. Sanding removes the tired top layer, revealing the fresh wood underneath, while polyurethane coatings enhance the beauty and durability of your floors. Staining offers the opportunity to customize the color of your timber floors, and whitewashing or blockout techniques create unique and stunning effects. Timber floor sanding provides numerous benefits, such as restoring the natural beauty of your floors, removing scratches and stains, enhancing durability, and improving indoor air quality. Knowing when to consider sanding, choosing the right sanding equipment, and properly preparing your floors are crucial steps for a successful sanding project. Follow the timber floor sanding process, and don’t forget the finishing touches to truly complete the transformation. By caring for your newly sanded floors, you can enjoy their beauty and longevity for years to come. So go ahead, revitalize your floors with timber floor sanding, and let your timber floors shine like never before.


